A practical guide for selecting the right sandpaper for wood furniture. This article explains sanding stages, grit progression, abrasive materials, and sanding techniques commonly used in professional woodworking and furniture restoration.
Why Sandpaper Selection Matters in Furniture Refinishing
Sandpaper selection determines how efficiently old finishes are removed and how smooth the final wood surface becomes. Choosing the correct abrasive allows restorers to remove varnish, lacquer, or paint while preserving the natural grain of the wood.
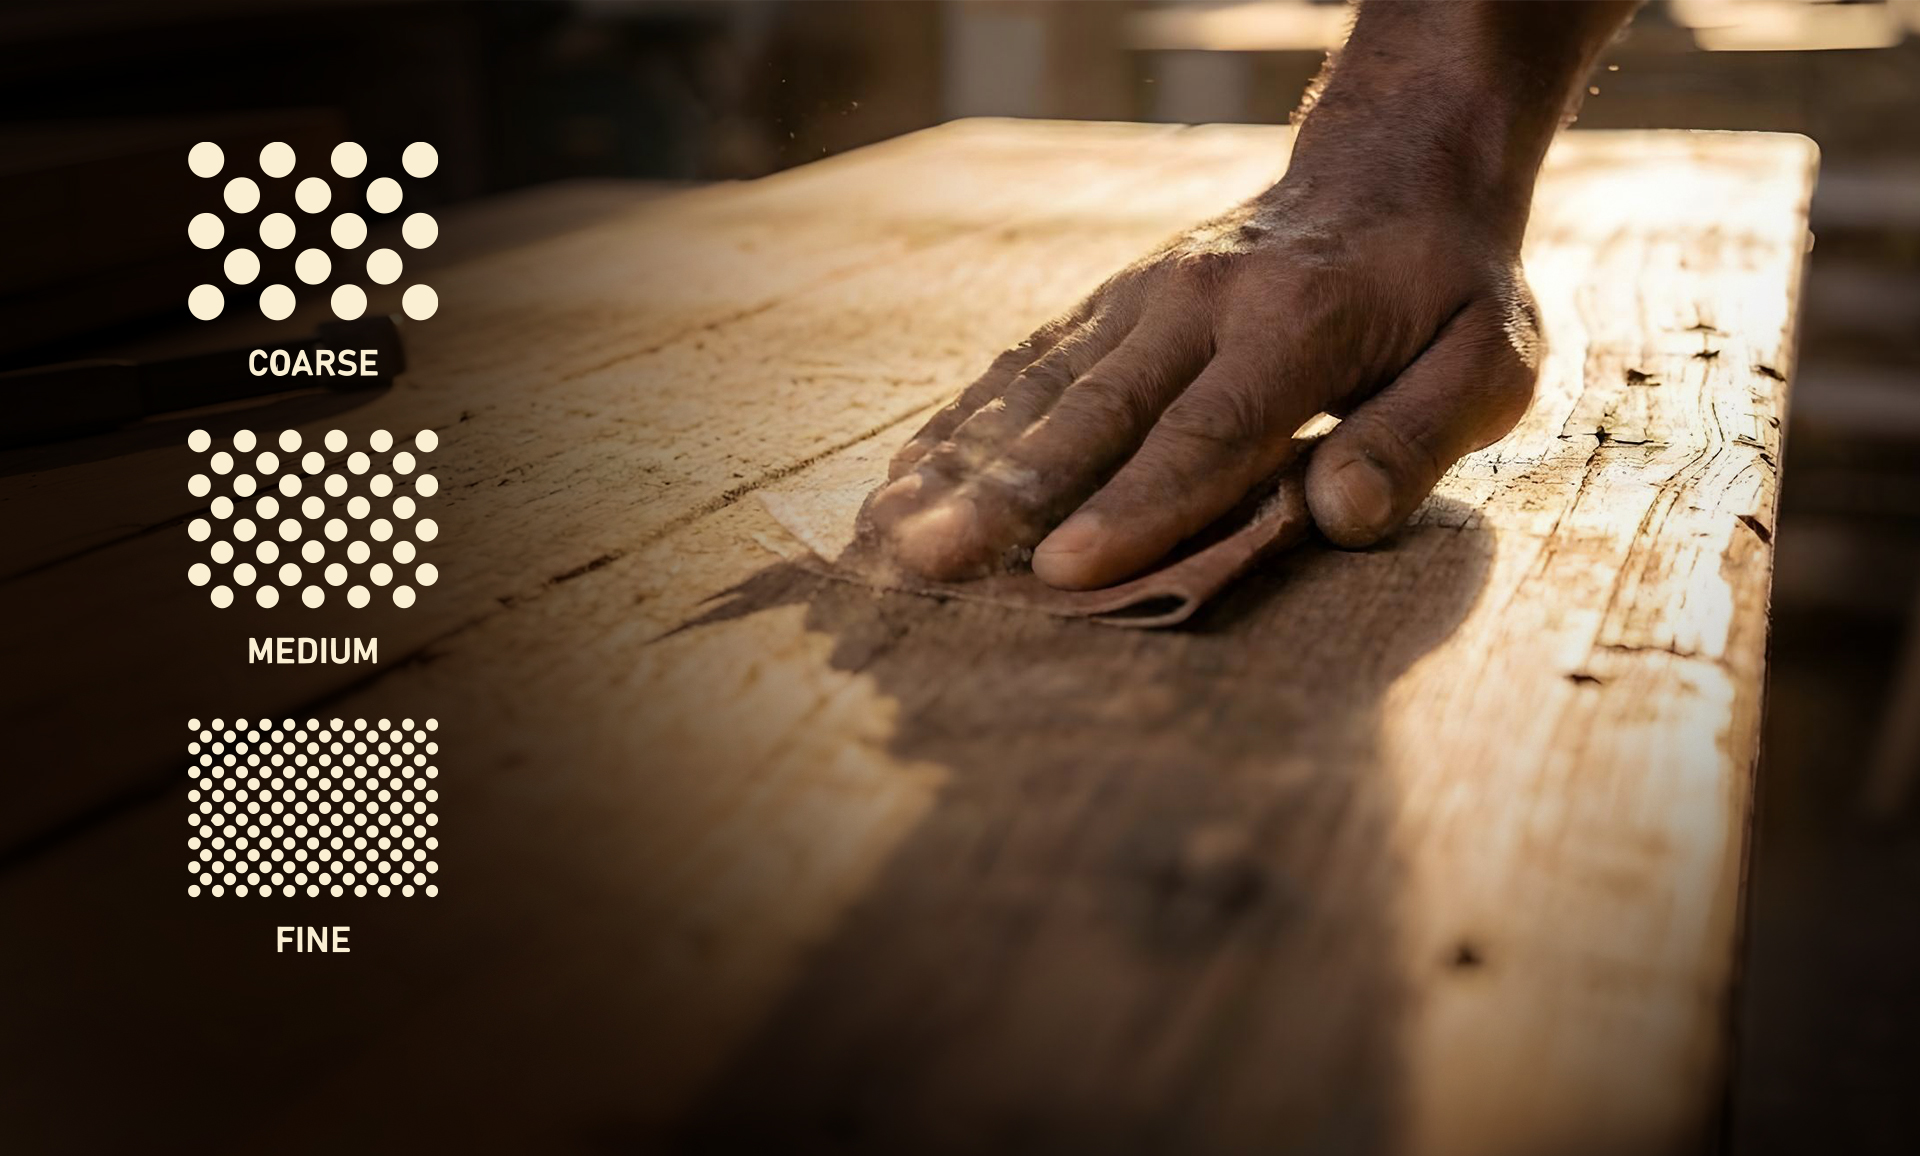
Furniture restoration involves controlled material removal. Coarse abrasives remove finishes quickly but leave deeper scratches. Fine abrasives smooth the wood surface and prepare it for staining, polishing, or painting.
Professional restorers therefore follow a progressive sanding sequence, moving gradually from coarse to fine grit abrasives so that each sanding stage removes the scratch pattern created by the previous grit.
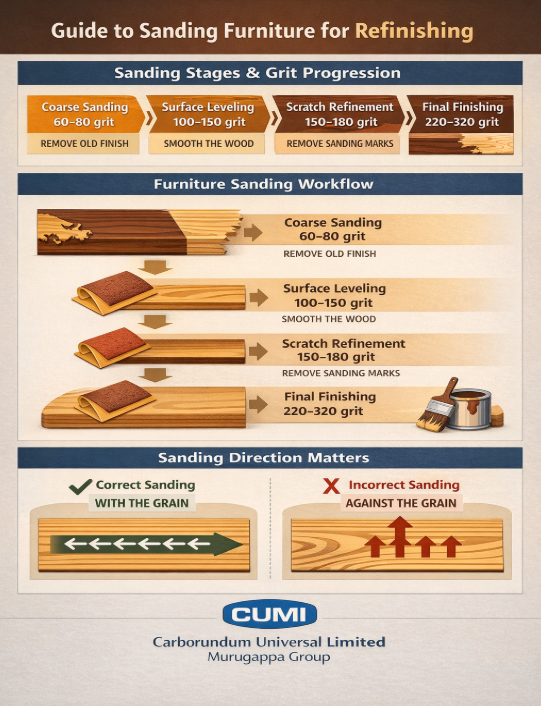
Typical Sanding Stages in Furniture Restoration
Furniture refinishing usually involves three sanding stages that progressively refine the wood surface.
Finish / Paint Removal
Coarse abrasives remove old coatings such as paint, varnish, or lacquer.
Recommended grit range: 60–80 grit
This stage focuses on removing existing finishes and exposing the bare wood surface.
Surface Leveling
Medium grit abrasives smooth the exposed wood surface and remove sanding marks from coarse abrasives.
Recommended grit range: 100–150 grit
This stage helps level the wood surface before final finishing.
Final Surface Preparation
Fine grit abrasives prepare the wood surface for staining, polishing, or painting.
Recommended grit range: 180–320 grit
This stage produces a smooth surface and removes micro-scratches.
Recommended Sandpaper Grit Progression
Grit Range | Purpose | Typical Application |
60–80 | Heavy coating removal | Removing paint, varnish, lacquer |
100–120 | Surface leveling | Preparing exposed wood |
150–180 | Scratch refinement | Removing marks from coarse sanding |
220–320 | Final finishing | Preparing wood for staining or painting |
Skipping grit levels may leave visible scratches in the final finish. Gradual grit progression ensures consistent surface quality. Common Abrasive Materials Used for Sanding Wood
Different abrasive materials influence cutting performance and sanding durability.
Abrasive Material | Characteristics | Typical Use |
Aluminum Oxide | Durable abrasive grains with aggressive cut rate | General woodworking sanding |
Silicon Carbide | Sharp cutting grains | Fine finishing and polishing |
Garnet | Natural abrasive producing smooth finish | Traditional woodworking sanding |
Aluminum oxide is commonly used in furniture refinishing because it balances durability with a consistent scratch pattern suitable for wood surfaces.
Hand Sanding vs Power Sanding
Furniture restoration often combines both sanding approaches.
Power sanding
Random orbital sanders are commonly used for sanding large flat surfaces such as tabletops, cabinet panels, and doors. They remove coatings efficiently while maintaining relatively uniform scratch patterns.
Hand sanding
Hand sanding is typically used for:
- edges and corners
- Intricate and contour surfaces
- curved furniture surfaces
- carved wood details
- decorative moldings
Using sanding blocks during hand sanding helps distribute pressure evenly and maintain flat surfaces.
Combining machine sanding with hand sanding allows restorers to maintain efficiency while preserving detailed furniture features.
Best Practices for Sanding Wood Furniture
Following proper sanding practices improves both surface quality and finishing durability.
- Progress gradually through grit levels instead of skipping sanding stages
- Sand along the direction of the wood grain to prevent visible scratches
- Replace worn sandpaper regularly to maintain cutting efficiency
- Use sanding blocks to distribute pressure evenly
- Remove sanding dust completely before applying stain or paint
Consistent sanding technique helps produce a smooth and uniform finish across the entire furniture surface.
Expert Insight
Proper sanding preparation also improves the way stains, oils, and coatings penetrate the wood surface.
Manufacturers of industrial abrasives and woodworking tools often recommend controlled grit progression because it improves both surface finish quality and coating durability.
Frequently Asked Questions
1. What grit of sandpaper is best for refinishing furniture?
Most furniture refinishing projects begin with 60–80 grit sandpaper to remove paint or varnish. Sanding then progresses through 100–150 grit for smoothing and 180–220 grit before applying stain or paint.
2. Should furniture be sanded before staining?
Yes. Sanding removes contaminants and opens the wood grain, allowing stain to penetrate evenly and produce a consistent color.
3. Is hand sanding better than power sanding?
Power sanding is efficient for large flat surfaces, while hand sanding provides better control for edges, corners, and detailed furniture designs.
4. Why should sanding follow the direction of the wood grain?
Sanding along the grain prevents visible scratches and helps maintain the natural appearance of the wood surface after finishing.
About the Author
This article was prepared by the CUMI Abrasives technical team, part of the Murugappa Group, a manufacturing conglomerate with more than a century of experience in materials engineering and industrial abrasives.
CUMI develops abrasive solutions used across industries, including metalworking, automotive manufacturing, woodworking, and surface finishing. The insights shared in this article reflect practical knowledge of abrasive materials and finishing processes used in both industrial and workshop environments.